
 |
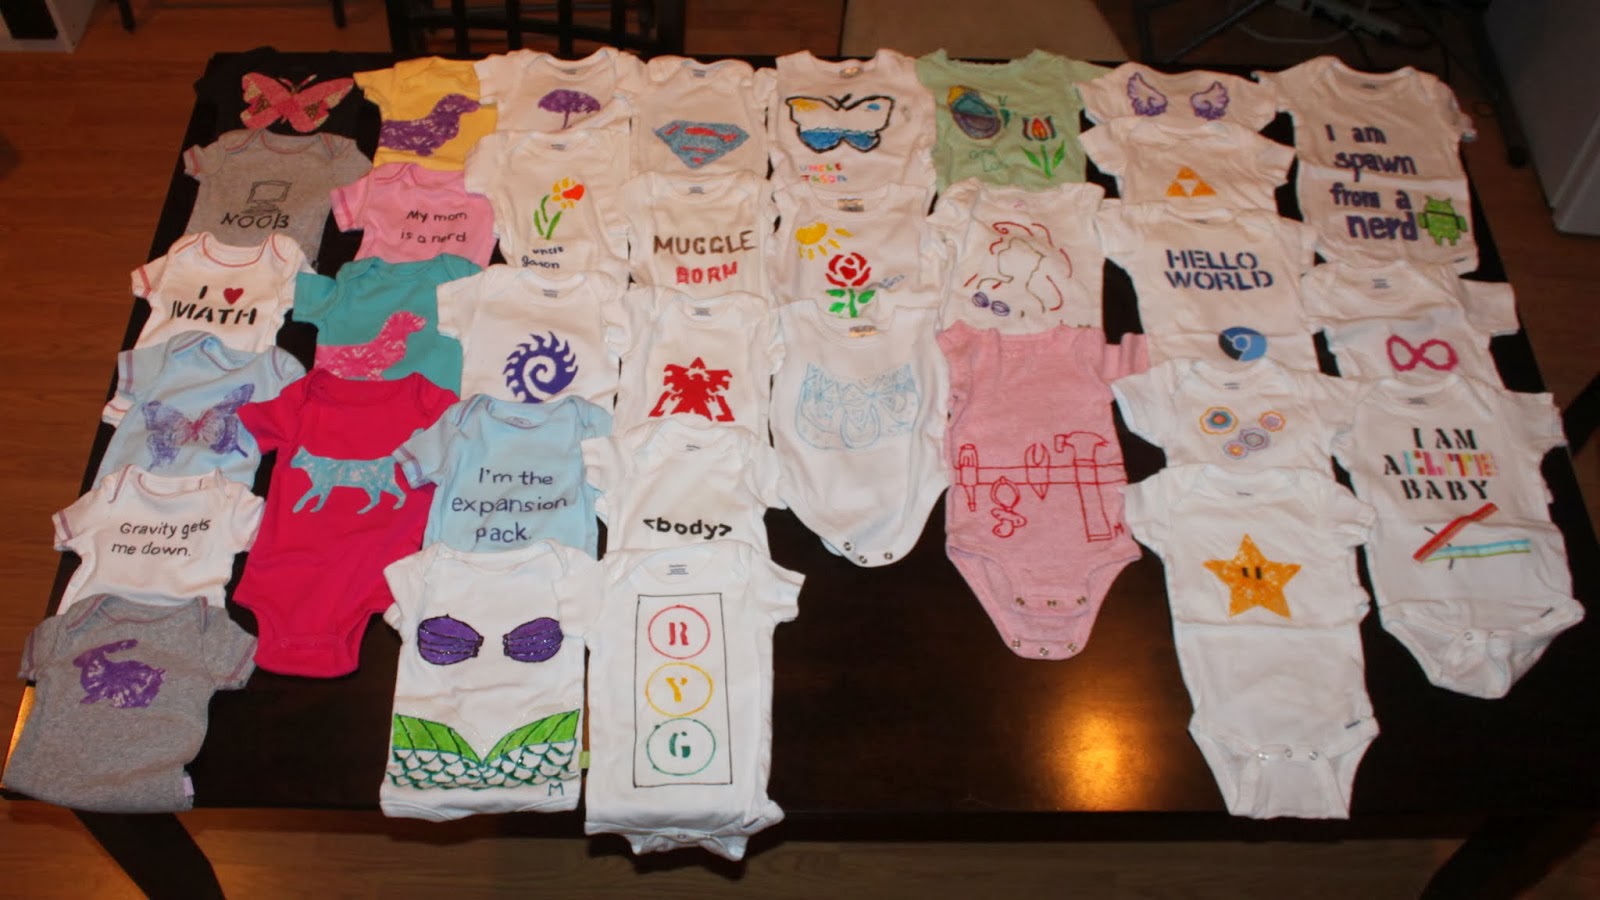
| All onesies created as of November 20 |

In PA, we used Tulip Dimensional Fabric Paint and Sargent Art fabric markers. The onesies created with the markers needed to be ironed for 4 minutes to be set. That was quite annoying and I cut a lot of them short. The puffy paint seemed easier to use than the fabric paint since you had a tip to write with. But there were air bubbles so they were also challenging. With the markers it said to wash them separately the first few washings. I did not do that and none of the markers bled on anything. I did do a sample onesie first before just washing everything.
I have washed everything and the puffy paint didn't hold up as well. Long lines are broken apart.

The iron on transfer that I used for the fabric, didn't work by itself. I needed to sew around the edges. Once I did that, everything stayed on fine. I've watched some of them twice since I sewed and they do fray a little but not past the stitching. You can see the star above the one on the left was just ironed on and then on the right I stitched around the fabric.

There were numerous ways onesies were created
- Cut out fabric, iron it on, stitch around
- Paint onesie with tulip paint (Freehand or with a stencil)
- Paint onesie with puffy paint
- Use a Sharpie to write words
- Use fabric markers to create designs
- Make a stencil with Freezer paper then paint on the fabric
- Paint onto a rubber stamp and stamp directly onto the onesie


A few people at the shower used stencils. I had trouble finding letter stencils small enough and got these at Walmart. Someone wished we had numbers and I've since tried to find numbers but failed. One thing I noticed is that if you were spelling a word, you could easily smear the letters to your left. I hear guests put a piece of paper down over the letters so that they would not smear. I didn't hear this tip and smeared my I love math a bit. Since I was doing mine at home I just did a letter and did something else and did another letter so there wouldn't be more smearing. We used sponges to paint on the stencils.


 |
| Paint to the stamps faded a bit after 1 time through the wash. |


- Print images from your computer that you wanted on the shirt. Print them the size you will need. Or if you are brave you can draw what you want directly on the dull side of the freezer paper.
- Trace the image onto the freezer paper. Keep in mind that freezer paper has one shiny side and one dull side. You want to trace the image on the dull side. I traced using a sharpie pen because a ball point pen just didn't work.
- Get your exacto knife and cut out the image(s). ( have a little craft board that I can cut with my exacto knife on and not ruin anything. If you don't have something like that, I think cardboard will work just fine. The sharper the curves the harder it is to cut out. Granted my exacto knife is about 10 years old and I got it at the dollar store and I use it a lot. It came with 5 blades and I'm still using my first or second one so it's probably a bit dull. When I traced "Future Nerd" I changed the font slightly so that the lines were straighter and easier to cut out. Note how I cut out the inside of the glasses and the inside of letters with separate pieces.
- Iron on the freezer paper shiny side down to your onesie. I ironed the main piece first then placed the inside of the glasses and the inside of the letters one at a time and put the iron down on them without having them move. Iron for a few seconds until you can tell the paper is fused to the fabric.
- Paint! I used a sponge. (Note: don't use a wet sponge that you just cleaned or it will cause the paint to be extra liquidy and you will ruin your shirt (see white Future Nerd onsie below.)) After dabbing on the entire image, I took my sponge and wiped across the image. It gave it a smoother look.
- Let dry. It doesn't have to dry the full 4 hours that the bottle says. I let mine dry about a half hour.
- Apply second coat if desired (I have done a second coat half the time). You can kind of see if onesie fabric is showing through and if it is, I tended to put a second coat.
- Let dry again just 30 minutes or so.
- Peel off the freezer paper. It should come right up. It's a little more challenging on the inside like the inside of the d or the glasses. I used a paper piercing tool to get under the paper to find a spot to start pulling it up.
- Let dry the full 4 hours.
- Some paints say to heat set them but mine did not have this step.
- Wash onesie but not for 3 full days!
If you plan to make a million of these they have specific cutters that will cut out freezer paper and you don't have to trace or use your own exacto knife.
 |
| The face you make when you realize the corner wasn't ironed down enough so the paint is now under it. |


 |
| The difference between freehand and freezer paper stencil |
 |
| Starcraft fans might recognize these |
I've made at least 15 onesies myself. The only thing I didn't personally use was the puffy paint but I was there when 5 other people used them. If you have any questions let me know.
I created even more onesies and have a newer post on them.
I created even more onesies and have a newer post on them.
Lots of good info here, I hope others see it. I love the one that says my mom is a nerd, and the star wars ones. I didn't see those last time. Awesome job on all these!
ReplyDeleteMy mom is a nerd might have been the first or 2nd one I did. I was a newbie. The star wars rebel was the last one I did. (and 3rd to last). I made it for Jen then Dave said we should have one.
DeleteThis is adorable! I love the little mrmaid that Megen made:) The "Future nerd" is also awesome. You gys did a great job!
DeleteLove, Mee-Ma (I changed the spelling to my Grandma name, it's now spelled more phonetically to match the sound of the word. Can't wait to hear my little "Angel Girl' say "I love you Mee-Ma" for the first time!! Excited!
Of course I'm way ahead of myself there!
DeleteYou've got a long time before the talking happens. I just can't wait to meet her!
DeleteHahaha - I love the "Noob" onesie. You are going to have so many onesies that you'll have to sew them together to make either different types of clothes or a quilt.
ReplyDeleteHeck. A quilt of onesies would be hard. Not very square at all.
The part with the designs is basically square. They do have some people on Etsy who just make quilts out of baby clothes because apparently clothes you don't even paint get sentimental. They are expensive. It's based on size but I was looking at a few she did and they were about $600. I think I could make squares and sew them together but I don't know how to properly do the batting 'n at.
DeleteMaybe just make sure all the squares wind up the same size as the batting and sew the piss out of it. I think that kind of quilt would be easier than one that's a whole mosaic of like 2" squares or something. But I'm naive, and haven't used a sewing machine since middle school. What do you use for the underside of the quilt? Any old thing? I guess I could google this, but sometimes it's nice to wonder about something for a second before looking it up.
DeleteI don't know for sure.
Delete